

1980 280ZX Dash Restoration DIY (with photos!)
 12-27-2011 | 12:09 AM
#1
Thread Starter
Registered User
Joined: Jan 2009
Posts: 95
From: Pleasanton, CA
1980 280ZX Dash Restoration DIY (with photos!)
1980 280ZX Dash Restoration DIY (with photos!)
Given the limitations of 10 images per post I'm going to chop this one up....
Hi guys,
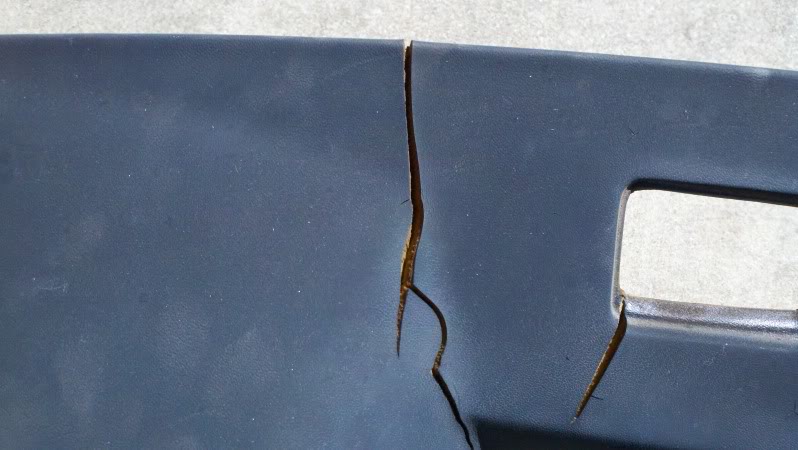
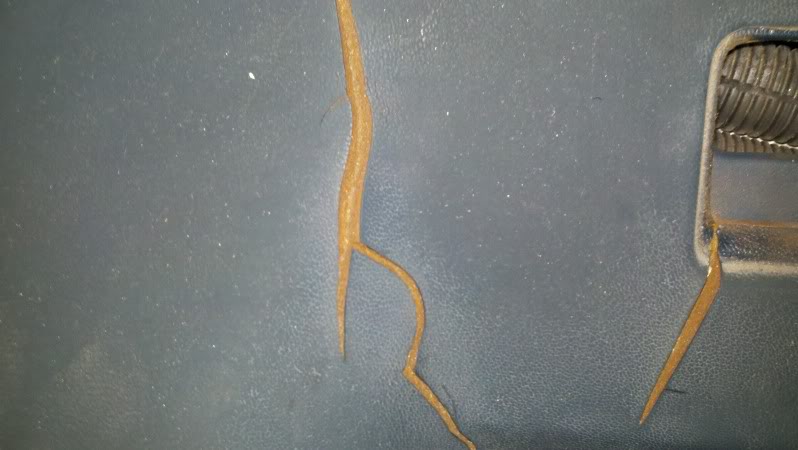
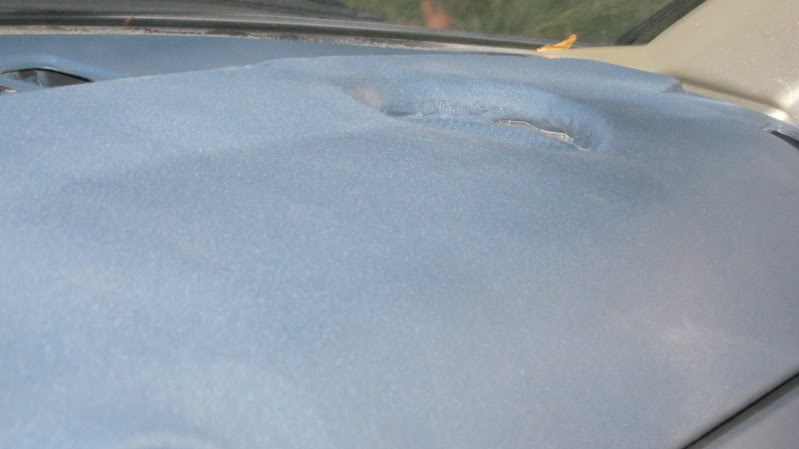
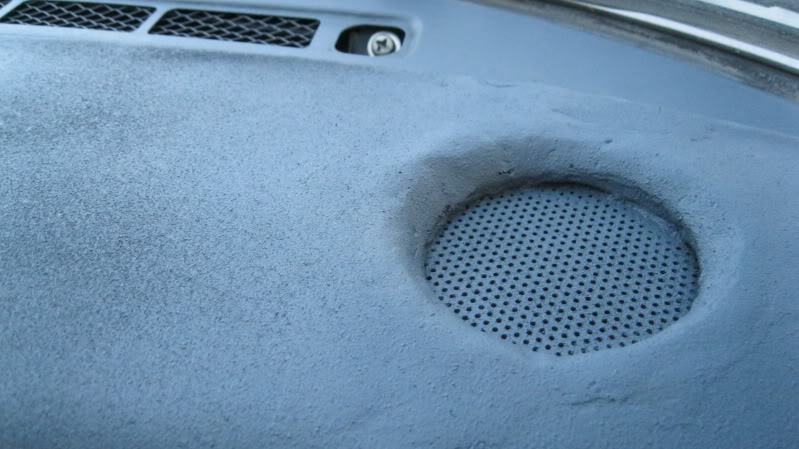
My 1980 ZX came to me from its original owner four years ago (free), and was in really great shape for its age and mileage (212,000�.now 220,000). The one thing that really bugged me about it was the condition of the dash � literally littered with deep cracks � some all the way through the dash.
I�ve been wanting to repair this dash for as long as I�ve had the car and finally got around to it this fall.
I followed this great DIY guide (for an S30) when I did the job:
http://www.classiczcars.com/forums/s...ocess-Pictures
I bought the following products for this job:
�Great Stuff� foam sealant
SEM Bumper Repair (part #68422)
SEM Texture coating (part #39853)
SEM Plastic and Leather Prep (part#38353)
SEM Blue Vinyl paint (forgot the part number and the can is long gone now�.)
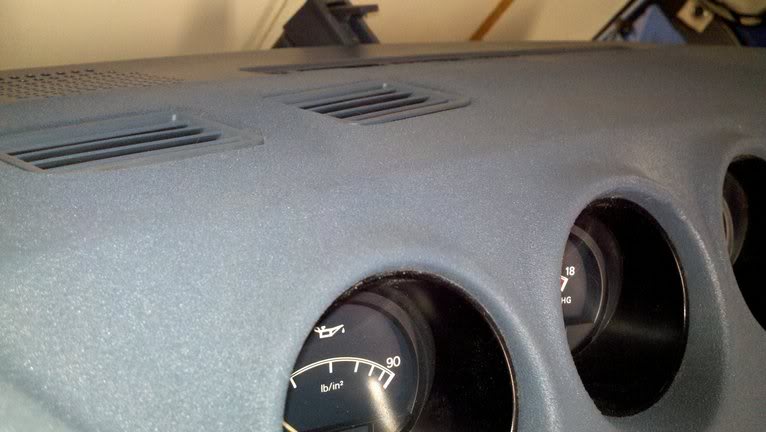
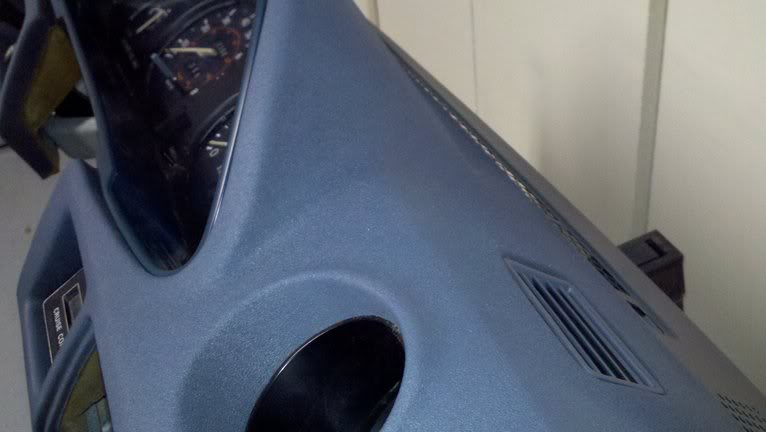
Here is the dash before the job:


Step 1:
Disconnect the negative battery terminal.
Remove the dash using the guide on Xenons130�s site: http://www.xenons130.com/dashremoval.html
Make sure you label everything � every bolt, every screw. Take lots of photos to document where things go, and how they go together. I did this, and over 3 months forgot certain steps (I had to remove and install the glove box 3 times to accommodate other parts I didn�t know needed to go on first!). Separate the foam dash portion from the metal part � all of the wire looms are connected to the metal portion of the dash. The foam part has a metal �core� and is flexible � be careful where you store it.
Step 2:
Ream out the cracks in the foam dash pad with a utility knife. Cracks on these dashes are not just straight fissures � the dash separates and the edges turn upwards as they pull apart, so you need to bevel the edges/cut them down so that the dash surface is LEVEL on both sides of the crack.
Step 3:
Clean the surface with compressed air. I used alcohol with a rag as well, since the dash was 3 decades old and wanted to get as much off the dash and exposed foam cracks as possible.
Step 4:
Fill the cracks with Great Stuff. Note, this will expand much more when it dries, so be careful. Don�t worry too much � you can cut it down when it dries. Better to have a little too much than too little. If your dash pad is cracked ALL THE WAY through, you may want to affix some painters tape on the underside to catch the foam and create a �base� for the foam to adhere to.
Step 5:
Cut the dried foam down to a level that is JUST below �flat� on the dash. The bubbly nature of the foam, while not solid, is actually really good for the bumper repair to adhere to. That said, you do want the foam level lower than the final dash level, since the bumper filler will account for some of the depth.
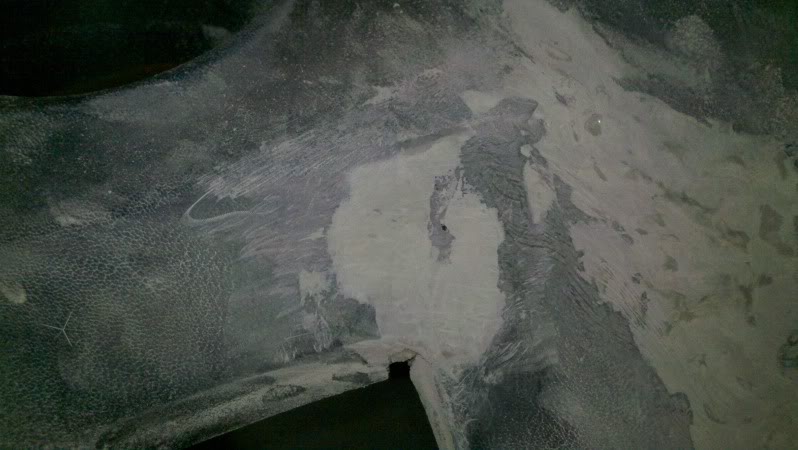
Step 6:
Once you�ve filled the cracks with Great Stuff and cut it down you�re ready to clean it again with compressed air, alcohol, and then fill in the small areas with SEM Bumper Repair. Use a putty knife or similar straight edge when doing this and WORK FAST � it does! Less is more and this dries fast. I didn�t realize this till later so I had to do more, but if I had to do it again, I�d apply smaller coats. I bought FOUR bottles/kits of this (about $8 each on Amazon.com) and it was just barely enough. At that price you might as well get 4 or 5�.you may need it later
Given the limitations of 10 images per post I'm going to chop this one up....
Hi guys,
My 1980 ZX came to me from its original owner four years ago (free), and was in really great shape for its age and mileage (212,000�.now 220,000). The one thing that really bugged me about it was the condition of the dash � literally littered with deep cracks � some all the way through the dash.
I�ve been wanting to repair this dash for as long as I�ve had the car and finally got around to it this fall.
I followed this great DIY guide (for an S30) when I did the job:
http://www.classiczcars.com/forums/s...ocess-Pictures
I bought the following products for this job:
�Great Stuff� foam sealant
SEM Bumper Repair (part #68422)
SEM Texture coating (part #39853)
SEM Plastic and Leather Prep (part#38353)
SEM Blue Vinyl paint (forgot the part number and the can is long gone now�.)
Here is the dash before the job:
Step 1:
Disconnect the negative battery terminal.
Remove the dash using the guide on Xenons130�s site: http://www.xenons130.com/dashremoval.html
Make sure you label everything � every bolt, every screw. Take lots of photos to document where things go, and how they go together. I did this, and over 3 months forgot certain steps (I had to remove and install the glove box 3 times to accommodate other parts I didn�t know needed to go on first!). Separate the foam dash portion from the metal part � all of the wire looms are connected to the metal portion of the dash. The foam part has a metal �core� and is flexible � be careful where you store it.
Step 2:
Ream out the cracks in the foam dash pad with a utility knife. Cracks on these dashes are not just straight fissures � the dash separates and the edges turn upwards as they pull apart, so you need to bevel the edges/cut them down so that the dash surface is LEVEL on both sides of the crack.
Step 3:
Clean the surface with compressed air. I used alcohol with a rag as well, since the dash was 3 decades old and wanted to get as much off the dash and exposed foam cracks as possible.
Step 4:
Fill the cracks with Great Stuff. Note, this will expand much more when it dries, so be careful. Don�t worry too much � you can cut it down when it dries. Better to have a little too much than too little. If your dash pad is cracked ALL THE WAY through, you may want to affix some painters tape on the underside to catch the foam and create a �base� for the foam to adhere to.
Step 5:
Cut the dried foam down to a level that is JUST below �flat� on the dash. The bubbly nature of the foam, while not solid, is actually really good for the bumper repair to adhere to. That said, you do want the foam level lower than the final dash level, since the bumper filler will account for some of the depth.
Step 6:
Once you�ve filled the cracks with Great Stuff and cut it down you�re ready to clean it again with compressed air, alcohol, and then fill in the small areas with SEM Bumper Repair. Use a putty knife or similar straight edge when doing this and WORK FAST � it does! Less is more and this dries fast. I didn�t realize this till later so I had to do more, but if I had to do it again, I�d apply smaller coats. I bought FOUR bottles/kits of this (about $8 each on Amazon.com) and it was just barely enough. At that price you might as well get 4 or 5�.you may need it later
12-27-2011 | 12:11 AM
#2
Thread Starter
Registered User
Joined: Jan 2009
Posts: 95
From: Pleasanton, CA
More steps....more photos
Step 7:
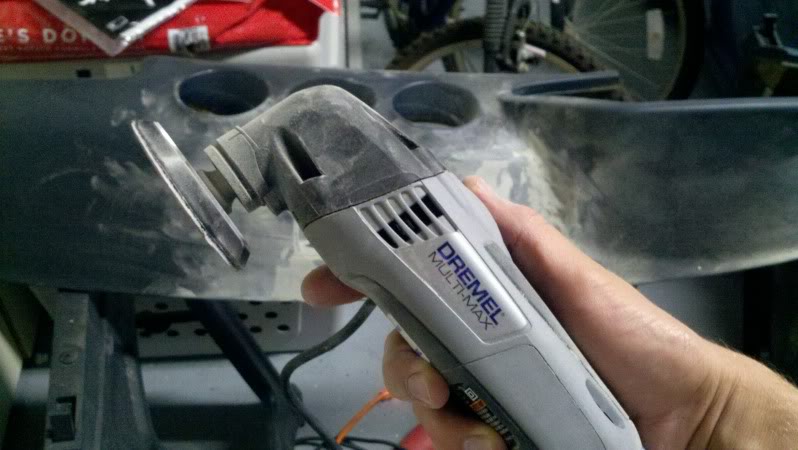
SAND. I used a Dremel Multi Max oscillating sanding tool and it was perfect for this. Patience is the name of the game here. Take your time. Less is more. Take time to clear the dust with air or a rag and run your hands over it to see if it�s smooth or has high points. Clean with alcohol and re-fill with SEM bumper filler where needed. Then sane again. This is the non-fun part and takes patience.
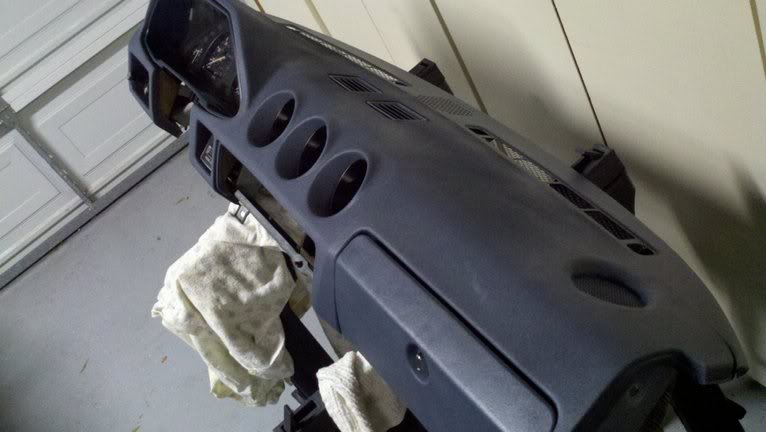
Step 8:
Prep and paint. Once you�re ready with the texture of the dash, spray the dash pad with the Plastic and Leather Prep from SEM and wipe with a clean rag to get dry. Then spray on the SEM texture coating and let dry. If you want, use something like 3M fine sanding pads to knock down the texture. I kept mine where it was with the can, since it covered up the imperfections I had. Had a done a better job with the surface I would have knocked it down more. Once you have done the texture coating to your liking, do NOT use the Plastic and Leather Prep again, as it will deteriorate the texture coating. Once the texture coating is to your liking, get painting! No real tips here, but less is more and take your time with several passes and about 12 inches of distance between the can and the dash. I also did some SEM clear coat after everything was done. Oh, and I prepped and painted the other trim on the dash (kick panels, under panels, steering wheel housing, etc.).
SAND. I used a Dremel Multi Max oscillating sanding tool and it was perfect for this. Patience is the name of the game here. Take your time. Less is more. Take time to clear the dust with air or a rag and run your hands over it to see if it�s smooth or has high points. Clean with alcohol and re-fill with SEM bumper filler where needed. Then sane again. This is the non-fun part and takes patience.
Step 8:
Prep and paint. Once you�re ready with the texture of the dash, spray the dash pad with the Plastic and Leather Prep from SEM and wipe with a clean rag to get dry. Then spray on the SEM texture coating and let dry. If you want, use something like 3M fine sanding pads to knock down the texture. I kept mine where it was with the can, since it covered up the imperfections I had. Had a done a better job with the surface I would have knocked it down more. Once you have done the texture coating to your liking, do NOT use the Plastic and Leather Prep again, as it will deteriorate the texture coating. Once the texture coating is to your liking, get painting! No real tips here, but less is more and take your time with several passes and about 12 inches of distance between the can and the dash. I also did some SEM clear coat after everything was done. Oh, and I prepped and painted the other trim on the dash (kick panels, under panels, steering wheel housing, etc.).


 12-27-2011 | 12:25 AM
#5
Thread Starter
Registered User
Joined: Jan 2009
Posts: 95
From: Pleasanton, CA
And more pics....
Things to note/things I would have done differently:
There are 4 caps that "pop" into place to cover the main dash screws...the 30+ year old ones are brittle and break. The ones I bought off eBay looked great but were brittle and broke easily when handled. I'm not sure how best to address capping these screw openings now...I welcome any advice from those who have done this.
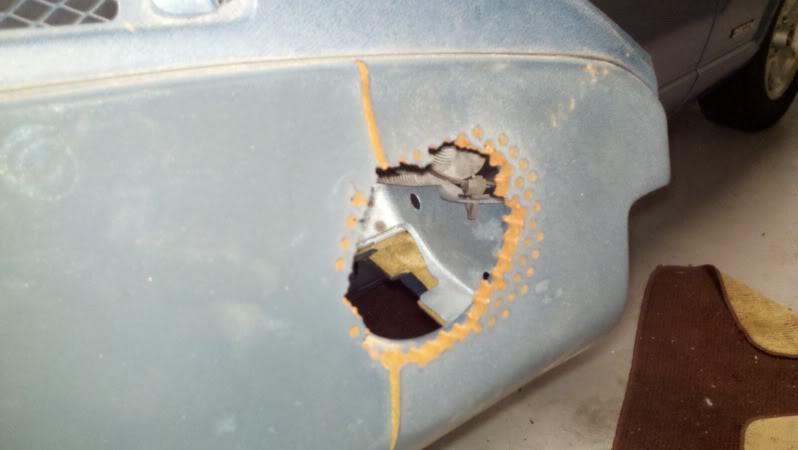
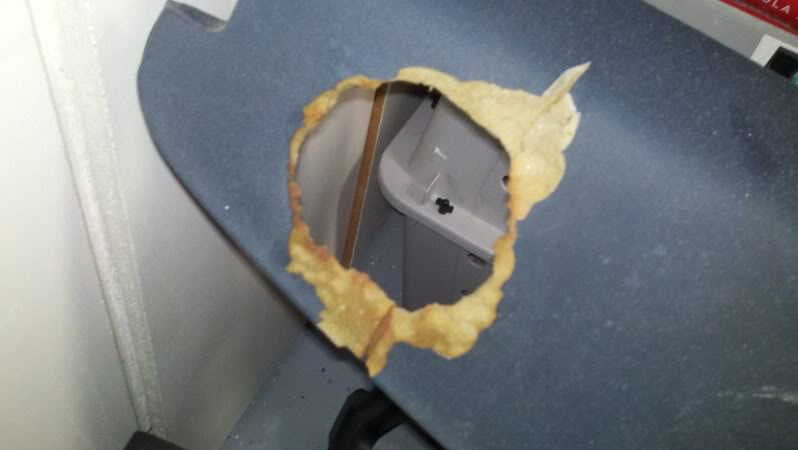
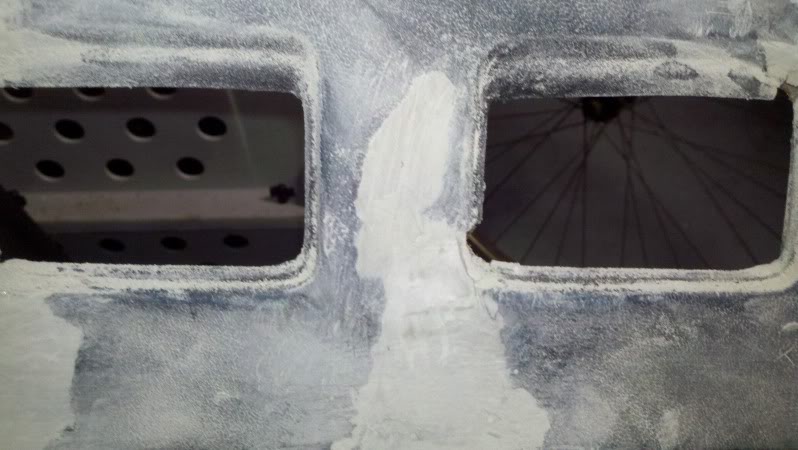
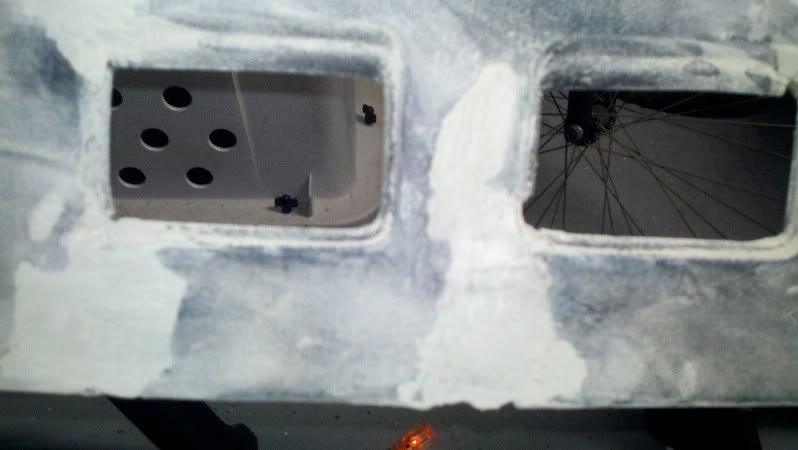
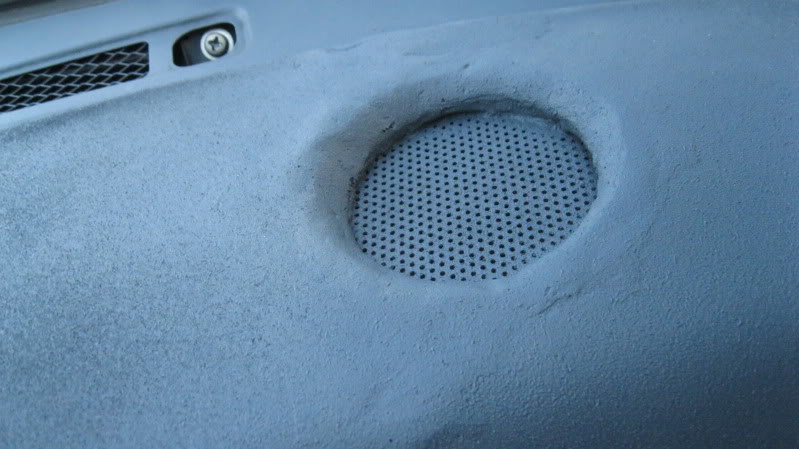
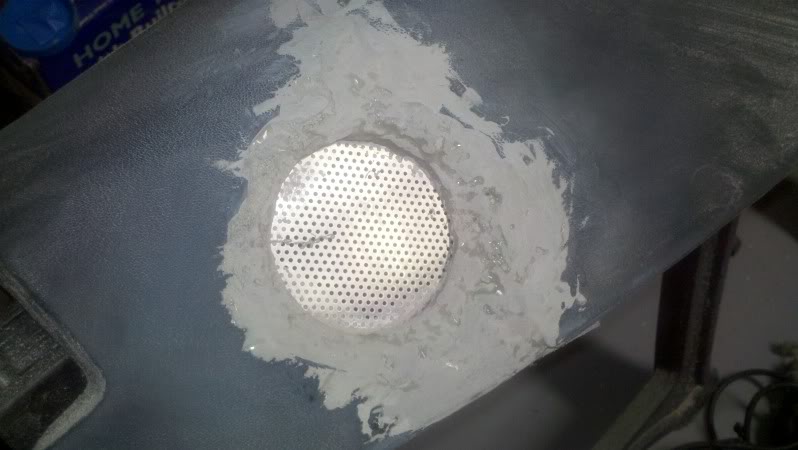
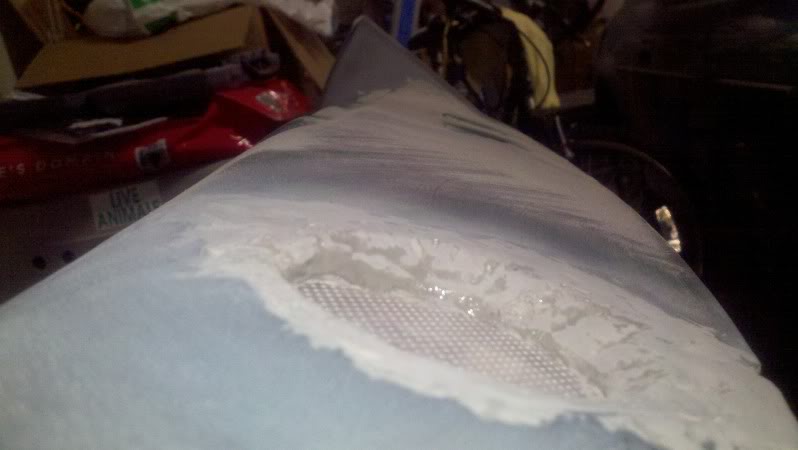
I had to fab a new passenger side speaker recession because my dash speaker area was rotted out and left me with a large hole. I used a perforated sheet of aluminum from the hardware store, and the SEM bumper filler to create an alternative as you can see in the photos. Keep yours if you can. Not sure I can recommend my approach�I may have just leveled it off and �lost� the speaker there to keep a more uniform look, if I were to do it over again.

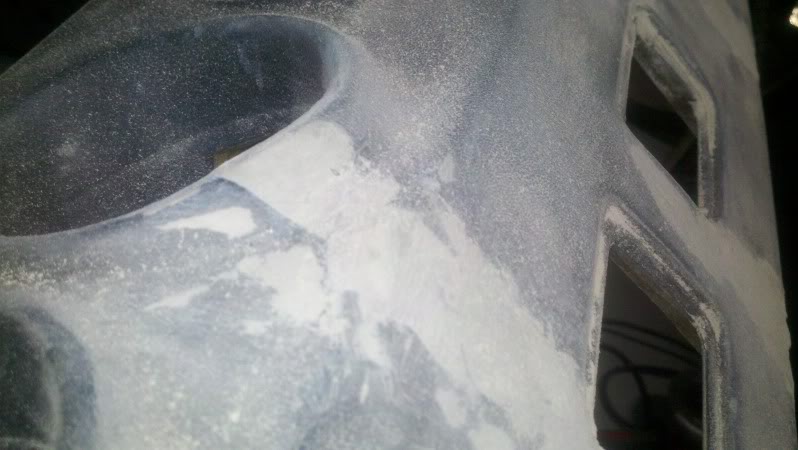
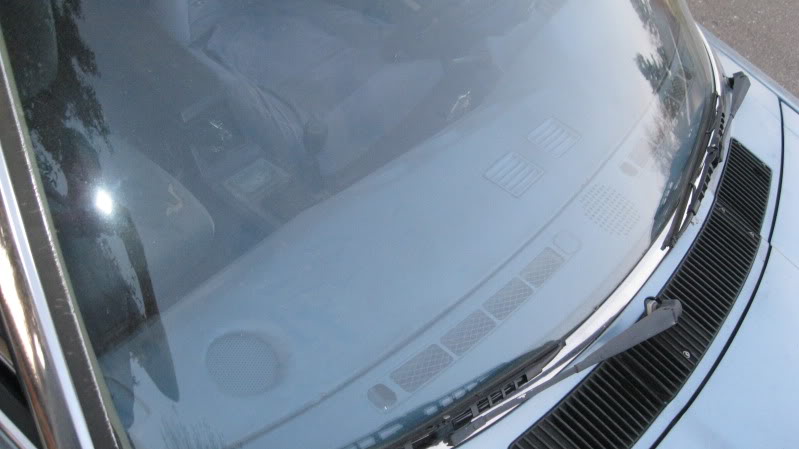
The edge of the dash pad that meets the metal part of the dash (where the defrost vents and the other speaker are)�.the dividing line was pretty damaged due to the deep cracks, so after my repair, the line was not uniform (you can see in the photos). Next time, I would have spent more time with painters tape or something similar to ensure that I filled in the edge to be uniform.
Primer paint. I had a really really bad dash and I�m happy with how it turned out. But, I still see some imperfections that I didn�t see BEFORE I PAINTED. I think, in hindsight, that had I sprayed with a simple grey primer after each �final� sanding/prep that I would have seen the imperfections and been able to address them before I moved on to the final stages.
PS
Oh, and this is the S30 that belonged to a coworker�s dad�.he inherited it, but now his 18 year old daughter drives it and hates it�what a shame (she works at the Grocery store down the street from me). Hopefully he�ll come to his senses and sell it to me some day so I can resurrect it.

 12-27-2011 | 12:30 AM
#6
Thread Starter
Registered User
Joined: Jan 2009
Posts: 95
From: Pleasanton, CA
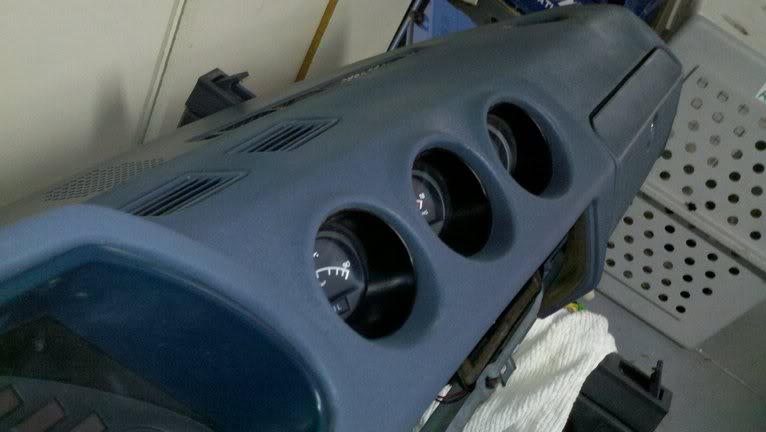
Oh, and be VERY CAREFUL whel removing the trim on the 3 gauge pods in the middle...the tabs break easily, I had to order replacements on ebay and jimmy them into place gingerly...it was a little scary.
This job is doable...just have patience, time and a digital camera
Phil
This job is doable...just have patience, time and a digital camera
Phil
12-27-2011 | 05:16 PM
#7

Registered User
Joined: Dec 2011
Posts: 13
Looks awesome! I was hoping that someone would post something like this. My 280zx dash is almost in the same condition. Does your perforated aluminum alter the sound quality of your speakers at all? Or is there really no difference?
 12-27-2011 | 05:53 PM
#9
Thread Starter
Registered User
Joined: Jan 2009
Posts: 95
From: Pleasanton, CA
Thanks guys. I used the lid of a peanut butter jar for a template to fill in the area around the speaker. I actually have not tried them out yet...speaker quality in this car sucks already....
 01-07-2012 | 09:48 PM
#11

Registered User
Joined: Oct 2011
Posts: 90
From: washington state
i want to know how to remove the pad from the dash frame.. as i have a near perfect pad to replace mine with. help... grg3210@yahoo.com
01-08-2012 | 01:57 AM
#12
Thread Starter
Registered User
Joined: Jan 2009
Posts: 95
From: Pleasanton, CA
Hey Greg, did you and I email about this earlier? The pad attaches with screws....really simple. All the wiring stays with the dash, not the pad.
Bad news though....a couple days ago I noticed hairline cracks where I had repaired in some spots, but not all. Pretty bummed though
Bad news though....a couple days ago I noticed hairline cracks where I had repaired in some spots, but not all. Pretty bummed though
01-09-2012 | 05:11 AM
#13

Registered User
Joined: Dec 2011
Posts: 10
That sucks! You did one heck of a job. I'm not doing a restoration, so I'm planning on going with a dash cover. I think I might fill the cracks with some great stuff and sand it down first though. Thanks for the idea!
01-09-2012 | 10:58 PM
#14

Mr Z++ Wiki
Joined: Sep 2009
Posts: 2,195
From: Victoria, BC
You know these ones don't crack right?
 01-28-2012 | 04:47 PM
#16
Registered User
Joined: Oct 2011
Posts: 90
From: washington state
well we discussed the dash replacement but not the pad... now that i have one off to look at i see the screws.. a few are not in the easiest location.. your job looked pretty good! i will send you a few pics of mine.. i used epoxy..very effective.although when i picked it up it cracked and i re did it, now it looks good. i primed it to see how visible the crack would be. did not like it sanded it back down.. i found a interesting method... plastic epoxy and then after its tacky i put some "gorilla " glue on it. i quickly took a credit card and dragged it thru..the glue started re melting and was very easy to make it smooth. you have to work FAST. after i sanded it with several grades of sand paper/ i think i may have a winner!
01-30-2012 | 04:57 PM
#18
Registered User
Joined: Oct 2011
Posts: 90
From: washington state
took it outside to spray some primer on the crack..dash was out for about 1/2 hour...as soon as it saw the can of primer...it cracked... although much smaller crack...more epoxy..more sanding... still think this will work.. crack is nearly invisible now.. fingers crossed...

Thread
Thread Starter
Forum
Replies
Last Post
TylerSkidmore
280ZX Appearance Exterior, Interior
28
11-09-2015 01:14 PM
charliepagel
FS: 240Z,260Z,280Z & 280ZX (70-83)
1
03-27-2013 08:50 PM
Bookmarks


